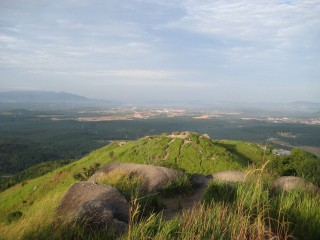
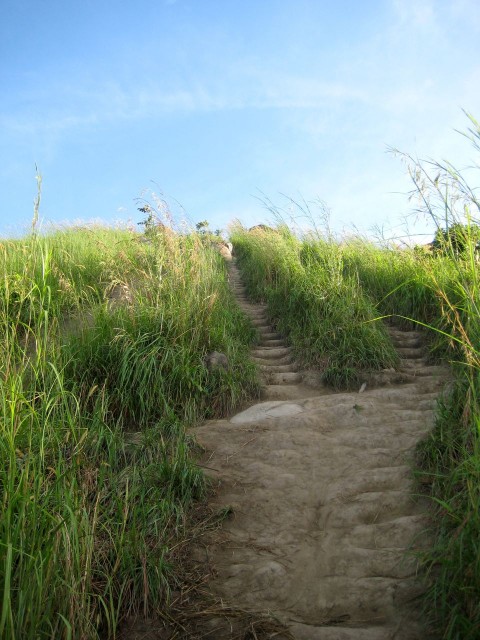
Gunung Bunga Buah

My climb up the 1430m Gunung Bunga Buah. A nice day trip, not too difficult for seasoned hikers, but the trail is more like an obstacle course.

DISCLAIMER: This post was written in 2012. Information may be out of date!

Location: Gohtong Jaya (Genting Highlands), Pahang, Malaysia.
Start point: 3.395699N, 101.767510E 922m a.s.l.
Summit: 3.374284N, 101.740044E 1441m a.s.l.
Difficulty: Moderately Hard. Some steep sections, trail is mostly muddy with a lot of obstacles. Not recommended as a first hike, but doable for anyone who exercises regularly.

Date climbed: Sat 1 Sep 2012

Having not climbed any challenging mountains for 2 weeks (not counting my 4th trip to Broga which I found to be easy & relaxed), I was itching to climb something new. I decided on Gunung Bunga Buah as it is fairly close to PJ/KL, and doesn’t have a reputation of being too difficult. I was a bit apprehensive as I was bringing along 3 other people (a total of 4 climbers) to a new location, and I had not climbed with any of them before. Further more, most of them had not done half/full day climbs before.

I would like to quickly touch on the subject of group dynamics, which should be an important aspect to consider – if you climb with people you’ve climbed with before, you know each other’s level of fitness & pacing, and how to motivate one another. I have to admit that I (as the navigator and person who researched the mountain) probably didn’t lead the group as well as I could have, and was too eager to plod on ahead at times. However, I’m glad that we all reached the summit safely and got back out before sunset.

Gunung Bunga Buah stands high at 1430m, but is different from other mountains like Nuang in that you start at relatively high altitude. The trail consists of many ups and downs rather than a single ascent to the summit and back. The great thing about this is that the whole climb is done in nice cool weather. On the other hand, do keep in mind that the return time from the summit will likely take the same amount of time. (On single ascent/descent mountains, the descent is almost always significantly faster) From the research I’ve done, Gunung Bunga Buah is also well known for its leeches. While I’m sure they do come out in large numbers after a rain, we only saw a few around on this particular day, and none of us got any bites. Needless to say, go mentally prepared for these bloodsuckers!

We left PJ around 7.20am, reaching Gohtong Jaya at 8.30am. It’s up to you how close you want to park to the starting point, which is a small orchard/farm. I decided to park in front of a restaurant at the shoplots, just for extra peace of mind as there is a lot more activity going on there. (Hopefully less chance of anything happening to the car, although these days anything can happen)

You’ll have to find your way through the orchard to the start of the trail. It’s a bit hard to describe, so either (1) use the GPS trail I recorded, (2) ask the people at the orchard, who were very friendly, or (3) if you have neither GPS nor people to ask, you’ll have to make a turn around one of the buildings and head towards the slope. Whatever you do, please watch your step and do not step on any of the plants at the orchard, as the land is private properly and we are outsiders ‘trespassing’ on their land to get to the trail. As goes without saying, do not litter – that goes for the whole journey!

The first part of the climb consists of a ~20 minute climb through steep and potentially slippery slopes. If you’re not used to these type of slopes, don’t despair, since it’s only for a short section. You’ll soon find yourself on an old tar road (which used to be the old road to Genting). Keep a mental image of this junction, as you’ll have to go back down the same way when coming back.

Emerging onto the old tar road after climbing through the orchard

From here, keep walking along the road until you notice it bending sharply to the right. At this point, turn left into the undergrowth, and in a minute you’ll emerge at the well known old quarry, with it’s grand looking cliff. Honestly, the photos don’t do it justice – it’s a sight you have to see for yourself.

Junction towards old quarry. Go left here.
The old quarry you’ll emerge at a minute later

Keep walking along the road, which has been closed for such a long time that nature has already reclaimed most of it. Most of the time, you’ll be walking through dense undergrowth, and you’ll be “in touch” (literally!) with nature. As such, long pants are recommended (though not required), if not you may end up getting quite a few scratches and possibly rashes along the way.

At some point, you’ll find  yourself on the other side of the mountain ridge, and you’ll get your first view of Bunga Buah’s peak. It may look far away, but it’s doable! The viewing point also includes a great view of the valley. On our climb, we could hear the loud cries of what we assume to be gibbons – though we never saw any of them.

First view of Bunga Buah’s peak

Keep walking along the dense path (It’s hard to imagine cars drove here many years ago) until you reach the “real” trailhead which leads to Gunung Bunga Buah.

Trailhead to Bunga Buah

From here, there’s a short steep climb, followed by a long downhill section. It can be tiring going down, because you know that you’ll have to go up on the journey back! Interestingly, I tend to prefer going uphill as it’s always easier to find footing and easier on the joints. Those who have climbed Gunung Nuang will recognize the similar clay. Eventually, you’ll reach the bottom of this section, and begin the climb up towards the summit of Bunga Buah. While there are no extremely steep sections, what makes the trail difficult is the sheer number of objects lying across the path – branches, roots, rocks, etc., which you’ll have to either clamber over or crawl underneath. Some people say that Bunga Buah is tougher than Nuang – which may be due to the trail difficulty. (However, Nuang requires vastly more endurance and strength. Overall, I’d say that Nuang is still MUCH more difficult).

Along the way, you’ll come across a clearing with the word “AIR”. I assume that if you turn off at this junction, it would lead to a water source. We did not follow it this round.

“AIR” – highlighted in the photo. Probably leads to a water source.

About half and hour on, you’ll reach the start of the “Rock Garden”, which some say shares similarities to Bukit Tabur. It’s no where nearly as dangerous as Bukit Tabur, but provides a nice change in terrain. At this point, you’ll also be able to get the best view of Genting Highlands (if there are no clouds). We stopped here to eat our lunch. The ground around the rock garden is also oddly spongy. I’d strongly recommend you take careful steps – I don’t know how much weight the ground can take, or if it’s secure. The last thing you want to do is go tumbling down!

View of Genting Highlands (behind the clouds) from Rock Garden

The summit of Gunung Bunga Buah lies about 30-40minutes from the rock garden. There’s a large clearing you’ll reach, but this is not the true summit. Just walk about half a minute further on until you see the triangular metal structure, and here you can end your journey! (I understand that the trail continues further on, down towards Batang Kali/Jalan Sungai Tua, which is a LONG way away)

Gunung Bunga Buah’s summit

As of September 2012, the summit is infested with bees, so if you don’t like bees, you probably won’t want to stay at the summit too long! On my climb, we set the turnaround time at 1.30pm, which gave us ample time to get back to Gohtong Jaya. Always set a turnaround time and stick to it strictly!

All in all, Gunung Bunga Buah was an enjoyable, relaxed climb. I’m not sure I’d care to return to it anytime soon, but it’s not bad. We ran into about 20 people in total along our climb, including a big group who had camped up at the summit the previous night. I expect that not many people (if any) climb Gunung Bunga Buah on weekdays. As with any climb, let someone know your plans. There is hardly any phone reception (Maxis, at least) throughout the climb (except near the start and towards the summit).

I have to congratulate 2 within my group – PY and ZR, who completed the climb with broken shoes. ALWAYS be sure to wear proper footwear when climbing places such as these!

GPS Details (From start to summit)


Click for GPS trail map image

Duration: 4 hours 24 minutes (can be done much faster)
Length: 7km
Average Speed: 1.6km/h
Max elevation: 1441m
Min elevation: 922m
Vertical Up: 827m
Vertical Down: 310m

Download GPX, KMZ (Google Earth)
View on EveryTrail

Preparations

Average time: 4hrs up, 3.5hrs down. Plan accordingly. We started ~9am and set turnaround time at 1.30pm

  • It’s not a race. Stick together, and if any can’t make it, turn back together.
  • Depending on weather, may be cold.
  • Bunga Buah is very famous for leeches. Dress appropriately or bring insect repellent if you want to avoid bites.
  • Lots of shrubs/bushes, long pants recommended.
  • Trail can be slippery.

Checklist:

  • Minimum 2 liters drink, isotonic recommended
  • High energy snacks/lunch
  • Hiking shoes & extra socks for comfort, if you need
  • Raincoat/poncho
  • Small towel
  • Hiking stick
  • Insect Repellent
  • Extra clothes (both shirt & pants), can leave in car
  • Plastic bags for dirty shoes/clothes, can leave in car
  • Extra slippers to change into afterwards, can leave in car
  • Emergency gear: flashlight, whistle, knife, lighter, 1st aid kit
  • Optional: gloves, tarp/flysheet, cord/string, mat, water filter/tablets, etc.

(See my personal packing list here)
Broga Hill for the 4th time

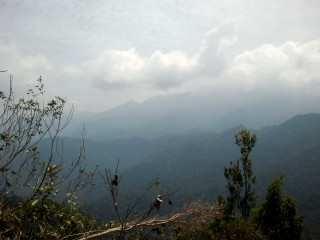
My 4th trip to Broga Hill near Semenyih, Selangor. Total hiking time is under an hour, and is suitable for beginners. The reward to work ratio is very high, as there are great views from the summit. It can be very crowded on weekends/public holidays, and unfortunately, garbage is littered all along the trail.

DISCLAIMER: This post was written in 2012. Information may be out of date!

Location: Broga/Semenyih, Selangor, Malaysia.
Start point: 2.938412N, 101.901154E 105m a.s.l. (Opposite Rabbit Fun Land)
Summit: 2.950264N, 101.903020E 396m a.s.l.
Difficulty: Easy. No technical skills required. Trail is not steep, but can be slightly slippery especially after rain. Good place for beginner hikers.

Date climbed: Tue 21 Aug 2012

This was my 4th trip to Broga Hill, which is famous for its lack of trees (It’s also known as the “Lalang” [long grass] Hill), and its good view of the surrounding area, given the relatively easy climb. Unfortunately, its popularity means that the trail is very worn, and there is a lot of rubbish littered along the trail. Additionally, it can be crowded on weekends and public holidays. In fact, on my 2nd trip there, our group was stuck in a constant human traffic jam all the way up to the summit, which upon arriving was so jam packed that we had no place to stand.

On this particular visit, it was busy, but not the worst. I went there to show a few of my friends around. My friends are all good hikers, in better shape than me, but it was their first time, and one of them was to lead another group of people a few weeks later. The climb takes between 30min to 1hr to climb, and since it is an easy trail, we decided to bring along a bag of charcoal and some food (sausages and Ramly burgers) to cook on the summit.

Parking costs RM2, and is located just opposite Rabbit Fun Land. From there on, the trail is very clear. Just remember to keep right at the fork ~5min from the car park (It’s the path which goes up in elevation). From there, you’ll walk through jungle for about 15-20min until you emerge at a steep climb to the 1st summit. From the 1st summit, you can hike onwards to the 2nd, 3rd, and 4th summit. The 4th summit requires a short rope section where you have to pull yourself up a few boulders. At the summit (396m), you can hoist yourself up the big boulders if you want to, or continue on to Gunung Tok Wan (which we didn’t). There are a few bees around the summit which you want to watch out for. In fact, on my 3rd trip there, one of us was stung and we were chased all the way down to the 2nd summit by other bees!

If you do climb Broga, please do other people a favor by bringing a few garbage bags and collecting the garbage on your way down. Yes, it’s not our garbage, but it will hopefully make the climb nicer for others.

The slope leading to the 1st peak after coming out of the jungle.
View from the 3rd peak
View of the 4th peak from the 3rd peak. The rocks require the use of a rope.
View from the 4th peak. KL (including the twin towers) is visible on a clear day
Cooking our breakfast. Photo by J. Ng.

GPS Details

Download GPX, KMZ (Google Earth)
View on EveryTrail

Duration: 47 minutes 53 seconds
Length: 1.8km
Average Speed: 2.2km/h
Max elevation: 396m
Min elevation: 105m
Vertical Up: 320m
Vertical Down: 32m

Gunung Nuang (Attempt 1: Failed)

A failed attempt on the highest peak in Selangor due to time constraints.

DISCLAIMER: This post was written in 2012. Information may be out of date!

UPDATE 26 September 2012: I reached the summit on my 2nd attempt! Read the story HERE.

On 17 August 2012, I attempted to climb Gunung Nuang with 4 other friends. Gunung Nuang, the highest mountain in Selangor, is known to be a fairly difficult climb which usually takes a whole day. From the various blog posts I have read on Gunung Nuang, it doesn’t seem to be a particularly fun mountain to climb, being famous for never-ending muddy and slippery slopes, and very few nice views. While the 1493m peak isn’t nearly the highest in Malaysia, the challenge comes from starting at a low altitude of 190m.

The climb can be separated into a few sections: Start – Never Ending Road – Kem Lolo – Kem Pacat – Puncak Pengasih – Summit.

The weather had been rainy for a few days prior to our climb, so we went mentally prepared for leeches and muddy terrain. We left KL around 6am and started our hike just after 7am, as the skies were just starting to turn light. By the time we had hiked for 20 minutes, almost everyone had picked up hitchhikers: leeches. They would become a constant sight throughout the trip, both on the trail and on our legs. By the end, everyone had 5-10 bites, except myself, as I had decent leech protection on.

We reached the end of the “never-ending road” at 8.30am (1:15hrs hike) . Unfortunately, we took a wrong turn and ended up crossing the river twice, unnecessarily. The detour cost us almost half an hour, after which we arrived at Kem Lolo @ ~9.15am (~2:00hrs hike). After that, it was a long slippery road to Kem Pacat, which we reached at 11.10am (4:00hrs hike). Unfortunately, due to time constraints (one in our team had to be down by 6pm) and my pace being on the slow side, we realized that we would not make the peak in time to get back by 6pm, so me and a friend stopped at Kem Pacat. The other 3 left any unnecessary items behind and set off for the peak.

The 3 other climbers returned to Kem Pacat at 1.40pm, unfortunately not having made it to the top. There had been a fallen tree along the path which took a long time to clear. They reached Puncak Pengasih (~1480m) at ~12.30pm, and decided that they wouldn’t make it in time to the peak for the 6pm return time. Also, water supplies were running slightly low.

We all headed down, reaching the entrance just after 5pm. We were defeated by Nuang, mostly because of time constraints. I will be climbing it again, as I know I am capable of reaching the top. For now, Nuang can laugh at us, but we WILL defeat it!

Here’s the 5 of us who climbed that day. (I didn’t really take any photos, and didn’t mark any waypoints on my GPS, as I was tired and didn’t have enough time to do so anyway. Next time!)

GPS Details

Download GPX
View on Everytrail
View on WikiLoc

Total distance: 10km (to Puncak Pengasih)
Total time: 5 hours 15 minutes (to Puncak Pengasih)
Average speed: 1.7 km/h
Max elevation: 1481m
Min elevation: 190m
Vertical Up: 1609m

From Everytrail:

Story
Didn’t make it up to the summit. A few factors:

  • Heavy thunderstorms for previous days meant trail was very muddy and slippery
  • High humidity meant more sweating
  • Time constraints (had to make trip < 10hrs)
  • Not enough water
  • Not enough sleep previous night
  • Accidental detour near Kem Lolo

There were a ton of leeches.

Tips

  • Climb on a dry day
  • If you have a water filter, you can refill at Kem Lolo (5.8km from trailhead ~600m)
  • You can leave unneeded supplies at Kem Pacat (1100m) to make your summit attempt easier. Either mark your belongings or leave a few friends there. Collect your supplies on the way down.
  • DON’T leave trash around!!!
  • At the first river, don’t go down the steps to cross the river. Take the trail on the left to follow the big pipe.
  • Bring headlamps, you may end up climbing in the dark

Automatic Shutdown/Wake Up on FreeNAS

In an attempt to conserve as much electricity as I can, I used some python scripting to automatically turn my FreeNAS server on and off as required. Requires programming knowledge.

WARNING: THIS POST ASSUMES SOME PROGRAMMING KNOWLEDGE, as you will have to tweak it to your own setup. If you aren’t able to generally figure out what is going on in this post, you shouldn’t try it. I take no responsibility to damage caused to your system! I wrote this post in a rush, so I may miss out basic steps.

In an attempt to conserve as much electricity as I can, I turn off my FreeNAS server whenever it’s not being used. Unfortunately, this was quite a tedious task to do manually. So, I used some scripting to automatically turn it on and off. The scripting for auto shutdown is done on the FreeNAS server, while auto wake up is done client-side.

Auto Shutdown

Using a cronjob, the FreeNAS server monitors a preset list of computers (via IP addresses). Once all the computers are off (i.e. no longer reachable on the network), it’ll turn itself off.

1) Create a file named shutdown.py with the following code: shutdown.py

2) Edit the IP addresses section with whichever computers you want to monitor in your network, e.g.:

###### IP addresses #####
# IP addresses go underneath this line, one on each line in the format: ip_list.append('x.x.x.x')
ip_list.append('192.168.1.2')
ip_list.append('192.168.1.3')
###### End IP addresses

3) Place the file somewhere on your server, and make sure it’s executable. You can make a file executable by SSH’ing into the FreeNAS server, and entering the command chmod +x /mnt/path/to/shutdown.py, changing /mnt/path/to/ to the directory that shutdown.py is in.

4) Create a cronjob to run the file. You can do this via the Web UI. For example, the following settings run the script every 5 minutes from 12am-5am. You can adjust this to your own liking.

Automatically Wake Up

Whenever any of the computers in the house are turned on, they send a Wake-on-LAN signal to the FreeNAS server and automatically mount the shares.

Mac OS

Python is required to run this script! Basically, these scripts will check every 3 minutes that the FreeNAS server is on, and that the network shares are mounted. If not, it will attempt to turn on the FreeNAS server (by sending WakeOnLAN) and mounting afp shares. Please feel free to edit the scripts as you see fit, or change the directories they are in, of course making the necessary changes.

1) Create the file com.hoongern.nasmounter.plist in /Users/<your username>/Library/LaunchAgents

2) Create the file nas.py in /Library/Scripts/. YOU HAVE TO EDIT the configuration in the script as required:

3) Restart your Mac. If I remember, launchctl should find the new task. You can run launchctl list and check if com.hoongern.nasmounter is listed. If it’s not, I can’t actually remember what to do. I don’t actually use Mac OS, you see…

Windows

To be honest, I haven’t written a script for Windows. Not that it should be hard at all – just use a similar python script, the Task Scheduler, and the “net use” command to mount Samba shares. If there’s enough interest, I can write it up and post it here – let me know!

Linux

Again, no script yet. Shouldn’t be difficult with a similar python script, cronjob, and the “mount” command to mount Samba/NFS shares.

OpenWRT, a great alternative to DD-WRT

A short opinion on the 3rd party firmwares DD-WRT and OpenWRT, running on my TP-Link TL-WR1043ND router.

For many years now, I’ve been running DD-WRT on my Linksys WRT54GL & WRT54G2.2 routers. The two routers have lasted for over 6 years, but recently they started to develop certain issues such as wireless dropouts and slow ping times (including packet losses).

As a replacement, I decided to go the cheap route and get a TP-Link TL-WR1043ND router. To be honest, my home network requirements are pretty small. I didn’t care too much about wireless throughput as most of the network is wired gigabit. The only features I needed were:

  • Flexible port-based VLAN tagging
  • Full dnsmasq control, for assigning hostnames/domain to local machines
  • Dynamic DNS client (for dyndns.org)
  • Remote SSH management

To be honest, I have managed to achieve much of this via DD-WRT, but the whole interface is messy, with various settings being in seemingly random places. In particular, VLAN/port based tagging was so confusing via the Web UI, and CLI management (via SSH) felt disconnected and more of a “hack”, as many commands have to be saved as start-up scripts.

Enter OpenWRT, which may not have as “nice looking” a Web UI (though more than enough, in my opinion). What draws me is the neat layout of the OS. All configuration is done by editing config files directly in the file system. In addition, all the configuration options are nicely separated into different files such as ddns, network, wireless, dhcp, firewall, etc. The flexibility is nearly limitless, and because one is able to give names to interfaces and reference them in other configuration files, things are far less confusing. Configuring the switch was a breeze via the Web UI, and I was able to set up my Unifi internet connection easily to split up Internet and IPTV.

OpenWRT feels much more like a fully-fledged OS. For example, there is direct access to iptables. All I need to do is to change /etc/config/firewall, and when I’m done, just restart it with /etc/init.d/firewall restart, just like in any other Linux installation. Also, OpenWRT has built in package management, with the ability to install more packages (Yes, DD-WRT does have similar ability with optware). I quickly added WebUI Wake-On-LAN and OpenVPN.

To be honest, there are a ton of other things you can do with OpenWRT, and this messy post isn’t really a thorough comparison of the two. But having used both DD-WRT and OpenWRT, I have to say that when you need flexibility and getting the most out of your router, OpenWRT definitely trumps DD-WRT (which is still a good 3rd-party firmware, no doubt, but more useful for general/easy tasks, or for nice graphs). Once you have grasped the basics of how to manage an OpenWRT installation, you’ll be amazed how the configuration is so much easier to apply and how it works.