DISCLAIMER: This post was written in 2012. Information may be out of date!
Location: Kuala Kubu Bharu, Selangor, Malaysia.
Start point: 3.572510N, 101.738128E ~300m a.s.l.
Summit: 3.543263N, 101.719998E 1103m a.s.l.
Difficulty: Moderate. No technical skills required, just a fair amount of stamina. The trail is not very steep, but it goes on for a fair amount of distance. Trail is easy to follow but has a fair number of obstacles (branches, fallen trees, etc.)
Date climbed: Thu 2 Aug 2012
View my post on my 2nd climb to Bukit Kutu (more details, photos, etc.)
Bukit Kutu is technically classified as a hill, but is higher than Mount (Gunung) Datuk which I climbed previously, probably due to its proximity to Fraser’s Hill, which stands even higher at over 1200m. While the name “Kutu” means head lice, I found no lice along the way. It is probably more likely that the name is a shortening of “Bukit Sekutu” which it has also been called in the past.
The drive from Petaling Jaya took about an hour and a half (North-South highway exiting at Bukit Beruntung, passing through Rasa and Kuala Kubu Bharu towards Fraser’s Hill, and then turning into Kg. Pertak). We drove along a narrow gravel road as far as the first bridge crossing, where there was some space at the side of the road to park about 4 cars. One can take a short walk down to the river, which would likely be an ideal picnic/recreational spot. On this particular day, we decided not to do so and to immediately begin our hike up Bukit Kutu.
From the start point, we crossed a total of 3 rivers and 3 streams. The hike through all these was on relatively flat ground. The first 2 rivers were crossed with bridges. The second bridge was broken (and has been broken for quite a while, as I understand), but was still easily crossed without any contact with the water. There are two forks in the path at which we kept right. (Going left at one of the forks apparently goes on to a waterfall, but I have not been there)
For the 3rd river, one can either take off your shoes & socks, and walk across (depth is less than 2ft/60cm), or try to leap from stone to stone (which one of my friends did successfully without getting wet). Keep in mind that if you do this, you may end up slipping into the water and getting your shoes wet. A stick can provide extra stability while crossing. The water was clear and refreshing, but as usual, don’t drink any water without treating/filtering it!

The 3rd river from the other side
The next 3 streams can all be crossed with shoes on. Just test rocks before placing your weight on them, otherwise you may end up slipping and getting your feet wet – something you definitely would not enjoy with a whole climb ahead of you.
Somewhere around the last stream we walked through an area filled with many fruits such as durian, mangosteen, jackfruit and rambutan.
After passing the streams, the trail gradually became steeper, although never as steep as Gunung Datuk is. Traction was limited as the path was sloping, although there are enough tree roots which form natural steps. The trail was abundant with bamboo.
After a while, we reached checkpoint 4 (not sure where CP1, 2, 3 were), and then CP5, which was where we encountered the famous huge boulders. From here, the trail became slower to traverse as there were many fallen trees and bamboo lying across the trail.
Near the summit, we came across the abandoned British outpost, where a chimney remained.
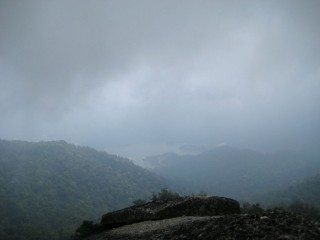
We rested here for a few minutes before climbing up to the summit via ladders. The summit is a small boulder on which you can probably fit, at the most, 5 people. Beware of a wasps nest which is on the underside of the first boulder! (still there as of August 2012) The last thing you would want is to be stung all the way up here. Unfortunately, the weather wasn’t on our side on the day we climbed, so we couldn’t see much. However, we managed to catch glimpses of the Sungai Selangor Dam, which we drove by on our way. On the plus side, the temperature was very cool and there was a strong breeze. The top provides a 360 degree view of the surrounding area.

View of Sg. Selangor dam from the summit
Total ascent time was 3.5hours, although it can be climbed in a much shorter time. We just decided to take a relaxed climb as we were in no hurry. We spent 40 minutes at the summit before beginning our 2 hour descent back to the car.
Extra Notes:
- While Bukit Kutu has been known for leeches, we didn’t see any on this particular day, probably because it hadn’t been raining for a while.
- I brought 2 liters of my homemade isotonic drink. This was just enough to last me through the climb, although I sweat a lot more than most people.
GPS Details
View my MUCH MORE detailed Bukit Kutu trail map post
Download GPX, KMZ (Google Earth)
View on EveryTrail (interactive map)
Total distance: 6.72 km (4.2 mi)
Total time: 3:24:06
Moving time: 1:52:19
Average speed: 1.97 km/h (1.2 mi/h)
Average moving speed: 3.59 km/h (2.2 mi/h)
Max speed: 14.96 km/h (9.3 mi/h)
Max elevation: 1103 m (3620 ft)
Min elevation: 287 m (941 ft)
Elevation gain: 905 m (2970 ft)
Download GPX, KMZ (Google Earth)
View on EveryTrail (interactive map)


