Gunung Nuang (via Pangsun/Hulu Langat)

After my 1st attempt at climbing Gunung Nuang and failing, I have been itching to go back and try again. Many non-outdoorsy people who have climbed Nuang before may think I’m crazy – after all, what does Nuang have to offer besides a long, boring road and leeches? Surely I could just jog around the field outside my house for the exercise, right? Well, read on to find out what Nuang had in store for the 2 of us who finally made it up to the summit this round!

DISCLAIMER: This post was written in 2012. Information may be out of date!

Location: Pangsun, Hulu Langat, Malaysia.
Start point: 3.21733N, 101.883156E 190m a.s.l. (map)
Summit: 3.266543N, 101.900246E 1493m a.s.l.
Difficulty: Fairly hard. The trail itself is actually manageable – it’s wide and there aren’t too many obstacles. All you need is a lot of strength & endurance, especially if you’ve never done a full day climb before.

Date climbed: Wednesday, 26 September 2012

Warning: This write up is more of a story than just information about Nuang! If you just want information, the GPS details & Preparation sections will interest you more.

After my 1st attempt at climbing Gunung Nuang and failing, I have been itching to go back and try again. Many non-outdoorsy people who have climbed Nuang before may think I’m crazy – after all, what does Nuang have to offer besides a long, boring road and leeches? Surely I could just jog around the field outside my house for the exercise, right? Well, read on to find out what Nuang had in store for the 2 of us who finally made it up to the summit this round!

First of all, my reasons for climbing Nuang:

  1. For those who enjoy climbing, it’s the highest mountain in the state of Selangor, and a worthy achievement – a stepping stone to larger mountains.
  2. It’s used as a benchmark of fitness. On many hiking clubs, they will rate their climbs in relation to Nuang, or have prerequisites such as “have done Nuang in 10 hours or less”.
  3. It’s the closest [real] mountain to PJ/KL, being less than an hour’s drive away.
  4. It gave me confidence to tackle higher mountains, and to know that mountains such as Ledang, Kinabalu, Rajah, etc. were doable. (Actually, many people say that Nuang is harder than Kinabalu)
  5. I just had to, after failing the 1st round. I just couldn’t let Nuang remain undefeated!

Weirdly enough, I wasn’t even supposed to have climbed Nuang on this particular day – I was scheduled to climb Gunung Rajah with my friend Lee YK on a 2 day 1 night trip (24-25 September). However, we had to cancel the trip as we weren’t allowed into the trailhead, even though we were all packed and drove all the way there. So, we decided instead to tackle Gunung Nuang, which would be my 2nd attempt, and YK’s 3rd summit attempt. Both of us really wanted to conquer Nuang at some point, so why not now?

Well, Nuang was not going down without a fight!

On Wednesday (the 26th) morning while I was still sleeping, I was awakened to the sound of thunder, and it shortly started raining hard. By the time I rose at 4.20am, the rain had subsided to a drizzle. I texted YK asking whether we should still attempt Nuang. We decided to go there anyway, and to turn back if necessary. (I’ll be honest – for the 1st half of the climb I expected to have to turn back not reaching the summit) By the way, I should note that I generally never recommend climbing with just 2 people. At least 3 is always a good thing.

We drove in a heavy drizzle and got to the base of Gunung Nuang at 5.50am. Nuang begins with a 5.8km wide road which gradually goes up and down, gaining altitude from 190m to 500m. Armed with my trusty flashlights (2x 4sevens Quark 123^2), we entered the trail at 6am, by which time the rain had stopped. Regardless, the place was unbelievably humid and warm (being at a relatively low altitude), thus the going was hot.

Just 10 minutes into the climb, the rain started again. I turned to YK and was going to say “I think we should turn back”, but instead just asked him what he thought. He was game to carry on, so we donned our raincoats (YK’s poncho was pretty much just like a large plastic bag); I stole YK’s rain cover for my backpack, and continued. However, just a few minutes later, we were both overheating from having raincoats on, while still being wet (the sweat and water was not evaporating), so we took them off and decided to just continue in our regular clothing. We did get wet, but it was much cooler! (Also, the rain was just a mild drizzle at this point)

We reached the end of the “never ending road” (an oxymoron?) +01H:17M (6:27am), at an altitude of 511m, quickly eating some peanut butter sandwiches for breakfast. (At this junction, KEEP LEFT to continue along the trail. Do not go down the steps to cross the river, even though the trail on the opposite side of the river looks more inviting!)

We continued, crossing a total of 5 rivers (all of which can be crossed with shoes on with ‘normal’ water levels, although you’d better be careful not to end up with wet feet!). The water levels were slightly higher than the last round, but still manageable. We reached the big Kem Lolo hut at +01H:31M (6:41am), where I reapplied insect repellent, left 1 liter of water for the return journey, and we continued.

The path between Kem Lolo and Kem Pacat was pretty muddy, with many pools of water collecting. However, I didn’t think it was too bad. Since we were ahead of schedule, we took a more relaxed pace with regular breaks so that we wouldn’t wear ourselves out. We were on a strict lookout for fallen branches, as YK had badly bumped his head the previous round. Needless to say, he avoided it this time! The drizzle was light all the way up until Kem Pacat @ 1095m, which we reached at +03H:22M (9:32am), half an hour faster than our last climb, even with the slippery slopes. (On the last climb, I was not nearly as fit, and was constantly huffing and puffing all the way to Kem Pacat even though I had offloaded ~3kg of water & gear to my friends!) I knew at this point that once we pushed onwards, we would try to summit no matter what, having come this far.

After eating more peanut butter sandwiches, we pushed on towards Puncak Pengasih (the false peak). Nuang unleashed a new weapon upon us – heavy rain! The trail quickly became a small stream, with water flowing everywhere. Soon, we were wet beyond caring, such that we would just step in puddles without thought, since our feet couldn’t get any wetter! The terrain after Kem Pacat also becomes a lot steeper (which makes me glad I stopped at Kem Pacat last round when I was much less fit), so we took our time and trundled on towards Puncak Pengasih @ 1475m, which we reached at +04H:45M (10:55am). Thankfully, the rain started to slow down at this point, but Nuang did not back down – we were hit by a gale force wind, which I have never felt before in Malaysia, and in fact did not believe that such winds existed. I was in fact worried that some branches may fall down on us. The good thing is that for most of the time, the trees really reduced the amount of wind which actually hit us.

Neither of us had ever been beyond Puncak Pengasih (the place where YK turned back on the last trip), so we were on an unknown path from here on. The terrain between the two peaks is actually not too difficult – the descent & ascent to the valley in between the peaks is very rocky. In the middle of the valley, it’s mostly sandy/soil, which in our case meant huge pools of water, which we just stepped in because our feet were soaked.

However, Nuang wasn’t going to give up that easily! Just 5 minutes before the real summit, we came across a tree which had fallen across the path. There was a huge wasps nest on it, which was thankfully empty. However, there were a lot of small branches blocking the path, a few of which were covered with hundreds of ants. Just a minute later, I felt a sharp bite on my hand, and found a tiger leech (different from the normal leeches whose bites don’t hurt) which had just bit me! I quickly removed it, and sprayed it with insect repellent for good measure, so it wouldn’t return. To be honest, coupled with a few ant bites and the fallen tree, I was ready to turn back at this point. However, YK said he’d take a look, and promptly crashed his way through the branches. Nothing was to stop him!

Indeed, at +05H:26M (11:36am), I noticed the tree cover thinning, and we emerged onto the summit @ 1493m. I can hardly describe the feeling of reaching the summit after a long slog through the jungle. It feels like you’ve won the most important race in your life! It was AWESOME. It was also VERY windy and cold. Originally we had planned to eat lunch at the summit, but (1) we were ahead of schedule, and it was still early; (2) it was really cold, and we wanted to get back under the cover of the trees from the wind; and (3) I knew there was more rain forecast for the afternoon.

We quickly ate some snickers, snapped some photos (no rain at that point of time, thankfully!), and headed down, squeezing back through the fallen branches. We reached Kem Pacat at around +7hrs (1pm), where we ate the best tuna sandwiches ever. We didn’t linger, and headed back down towards Kem Lolo, taking a few slips and falls along the way. It did start to drizzle again, and the jungle was very dim. We reached Kem Lolo at ~ +9hrs (3pm), where we bathed our feet in the rivers. The cold water on our feet was amazingly refreshing!

Finally, we got back to the ‘never ending road’, and the skies also started to lighten up. As a parting gift, Nuang decided to throw 3 leeches simultaneously onto my legs, which gave me bloody socks and itchy scars. How annoying! (YK also got his share of leech bites along the way) My wet feet & toes were starting to become sore from constantly rubbing against each other, but we emerged out from the jungle and back into civilization at 4.40pm. Interestingly, besides my sore feet due to wetness, I was actually feeling not too bad – not as exhausted as I have been on some of my other climbs.

So, would I do Nuang again? Definitely yes! I’m in fact very glad I climbed Nuang in the rain, because (1) when you go outdoors, you’re bound to get wet sometime, and (2) I got to experience some things I wouldn’t otherwise have – for instance, the howling wind. It was quite an amazing wind. Of course, we didn’t see anything along the way, since the skies were just filled with clouds & mist. Hopefully when I go back, it’ll be on a clear day so that I can actually look out from Nuang! The trip was definitely worth it, and I think YK said the same, reaching the top after so many tries!

Photos

Eating breakfast at the end of the ‘never ending road’
Waterfall near Kem Lolo
Reaching Kem Pacat (Leech Camp)
The famous tree at Kem Pacat
Gunung Nuang’s summit
The metal shelter marking the summit
Malaysian flag at the summit
One of the few nice things we saw throughout the whole hike

GPS Details (from start to summit)

Download GPX, KMZ (Google Earth)
View on EveryTrail

Duration: 5 hours 15 minutes
Length: 11km
Average Speed: 2.1km/h
Max elevation: 1491m
Min elevation: 189m
Vertical Up: 1717m
Vertical Down: 411m

Preparation

Gunung Nuang, the highest mountain in Selangor, takes a person of average fitness (with regular exercise) 4-6 hours to summit, and 3-5 hours to descend (Total about 7-11 hours). I would not recommend it as a first climb (though it’s definitely doable if you’re reasonably fit) – try something like Bukit Kutu or Gunung Bunga Buah first.

For an 11hr climb, my _estimated _time to checkpoints (distances & elevations following my GPS):

  • 00:00 Start (0km, 190m)
  • 01:30 End of never ending road (5km, 510m): When you see a junction, keep LEFT (you’ll end up following a pipe); don’t go down the steps across the river. Keep following the pipe (cross the river when it does) up to Kem Lolo. There are a total of 5 river crossings.
  • 01:45 Kem Lolo (5.3km, 510m)
  • 03:45 Kem Pacat (9.3km, 1090m): The trail gets MUCH steeper and rocky after this, and there may be more obstacles.
  • 05:15 Puncak Pengasih (10.6km, 1475m): You’ll have to descend through a valley to reach the real peak. Remember where you came from as there are a few paths leading to Puncak Pengasih, I believe.
  • 06:00 Summit (11.4km, 1493m)
  • 06:45 Puncak Pengasih
  • 08:00 Kem Pacat
  • 09:45 Kem Lolo
  • 11:00 Back to base

Follow this ONLY as a guide! I recommend that however fast you are, to allocate at least a 12hr block for climbing, in case of any delays or bad weather.

Notes:

  • You may have to pay RM1 per person. The sign also says to register at the police station (always a good idea), but we didn’t notice this until we finished.
  • Poor phone coverage. There is sporadic coverage between Kem Lolo and Kem Pacat (Maxis). After Kem Pacat there was no reception at all.
  • 5 river crossings. At normal levels, you can hop from rock to rock without having to take off your shoes.
  • Rain protection is recommended for any electronic items or clothing.
  • There are quite a lot of leeches around, especially if it rains beforehand (or during your climb). Wear protection as necessary.
  • If you are prone to chaffing, apply vaseline/bodyglide/etc. as necessary.
  • A headlamp/flashlight is essential!

Checklist:

  • Minimum 3L fluid, isotonic recommended. I personally brought 4.5L on this trip, leaving 1L at Kem Lolo and 600ml at Kem Pacat, and it was just enough, but I sweat more than most people. YK brought 3L which was sufficient.
  • High energy snacks/breakfast/lunch
  • Hiking shoes & extra socks for comfort, if you need
  • Raincoat/poncho
  • Small towel (for sweat/etc.)
  • Hiking stick
  • Insect Repellent
  • Small plastic bag to keep electronics dry in rain
  • Extra clothes (both shirt & pants), can leave in car
  • Plastic bags for dirty shoes/clothes, can leave in car
  • Slippers/Sandals to change into afterwards if shoes are muddy
  • Emergency gear: flashlight, whistle, knife, lighter, 1st aid kit, etc.
  • Optional: gloves, tarp/flysheet, cord/string, mat, water filter/tablets, etc.

(See my personal packing list here)
Pine Tree Hill

A not-too-difficult 6hr round trip hike up Pine Tree Hill (1461m) near Fraser’s Hill. Beautiful view, and cool & refreshing trail, all above 1200m.

DISCLAIMER: This post was written in 2012. Information may be out of date!

Location: Fraser’s Hill, Malaysia.
Start point: 3.712077N, 101.728494E 1329m a.s.l.
Summit: 3.710520N, 101.697086E 1461m a.s.l.
Difficulty: Moderate. Mostly easy trail, but contains a fair number of tree trunks to clamber over/under.

Date climbed: Fri 8 Sep 2012

For a while, I’ve been interested in climbing Pine Tree Hill as it’s known to be a relatively easy hike, but most importantly it’s a cool hike as all climbing occurs above 1200m. Especially after climbing mountains like Gunung Nuang and Gunung Datuk which can be quite hot, I was interested to have some cooler hikes, hence Gunung Bunga Buah, and now Pine Tree Hill. The only reason why I had not made the trip to Pine Tree Hill previously was the amount of time it takes to drive up to Fraser’s Hill from PJ.

A group of us decided to make the trip last Friday, and we left PJ at 7am. After making a few wrong turns, loosing half an hour in the morning rush hour, we made it up to the top of Fraser’s Hill at 9.30am. We quickly registered with the Police Station (whenever there are authorities you can register with, even better for free, it’s always recommended!), and made our way to the start of the Pine Tree Trail, and entered at 9.55am, half an hour later than we had planned for.

Entrance to Pine Tree Trail

We had set our turnaround time at 1.30pm, so we would have to move fairly fast to make it to the top. The weather was beautiful throughout the whole climb – it was mostly cloudy with patches of sunshine, although at times we did worry whether it was going to rain!

Just a few minutes after entering the trail, we got our first ‘open’ view of the surrounding hills and valleys.

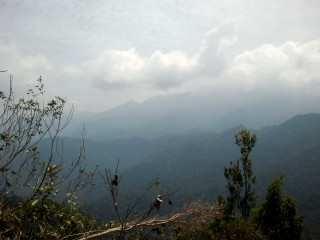
View of hills & valleys near the start of the trail

The trail is very well defined for the whole way, and we passed by (if I remember correctly) 3 rest huts – one right at the start, another about 1km in, and a broken hut (doesn’t provide any shelter) a little bit later on.

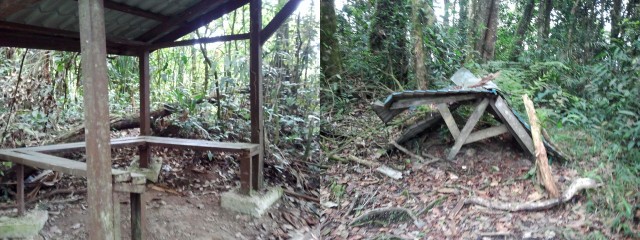
2nd rest hut & broken hut

In addition, we passed by an interesting tree root formation which one can crawl under. (Sorry for the poor photo quality)

Tree Root “Shelter”

About 2/3rds of the way, we got our first [not so great] view of Pine Tree Hill itself.

First view of Pine Tree Hill

Around the 3.6km sign, we passed by a sign saying “Water Point”. Presumably if one follows the trail, it’ll lead to a water source. (Otherwise, that would be a pretty mean joke!) On the right, there’s an upwards trail leading to a campsite.

Trail to water point, with campsite nearby

Just before the summit of Pine Tree Hill, we reached the famous ‘rope section’, where we had to pull ourselves up steep rocks and soil (About 60-70 degrees). I recommend against the use of ropes while going up (hold it only for support, not for pulling), and instead rely more on grabbing the rocks – the ropes are more useful when descending. Remember that only one person should be using the ropes at any time!

Rope Section

At the top of the rope section, the left path leads to the “summit” of Pine Tree Hill. I’m not sure where the middle path goes. The right path leads to another beautiful viewing point on the other side of the hill.

View from the summit. Mt. Benum (2107m) is barely visible on the right behind the clouds
The view back towards Fraser’s Hill
Panorama of the other side of Pine Tree Hill

We reached the summit at 12.50pm and ate lunch there. From the summit, one can actually go further on to the “twin peak”, which is a second summit close by, which should take about 1hr+ round trip. Unfortunately, we had to get out of the trail by 4.30pm (to get back to PJ by 7pm), thus we didn’t carry on.

Overall, Pine Tree Trail is a fairly beautiful trail to walk on – cool & refreshing. There are a decent amount of interesting plants along the way, although we didn’t manage to spot any of the pitcher plants we were on the lookout for. We did pass by a huge wasp nest on the way, although it didn’t look active (we weren’t about to test that theory!). Phone reception is fairly poor along the way, although at the summit of Pine Tree Hill you’ll get a decent signal. The one thing I’d recommend you watch out for is what you put your hands on when clambering over tree trunks – I put my hand right into a pile of dung which was covered with ants! It wasn’t pretty…

GPS Details (from start to summit)

Download GPX, KMZ (Google Earth)
View on EveryTrail

Duration: 2 hours 57 minutes
Length: 5.9km
Average Speed: 2km/h
Max elevation: 1461m
Min elevation: 1233m
Vertical Up: 648m
Vertical Down: 516m

Preparations

Hike is all within 200m height, but there are a lot of small ups and downs. Total ascent/descent both ways will be almost 1200m. Some steep sections with rope. Other parts have stairs, which makes it easier.

Average hike time is 3hrs to summit, 3hrs back. Going to Twin Peaks will take an extra 1.5hrs. Be sure to mark the trail well if you decide to go to Twin Peaks – I’ve read of people getting lost on the way back.

  • You can bring an extra labeled bottle of water and leave it halfway and collect it on the way back if you don’t want to carry it around.
  • Poor phone coverage
  • No river crossings
  • Temperature should be cool the whole way. Since we’re hiking you shouldn’t need a jacket, but you may want to bring an extra singlet/longsleeve shirt in case you get cold.
  • Pine Tree Hill isn’t famous for leeches, but there will likely be a few around

Checklist:

  • ~2 liters drink, isotonic recommended.
  • High energy snacks & lunch
  • hiking shoes (or shoes with grip), extra socks for comfort, if you need
  • Raincoat/poncho
  • Small towel (for sweat/etc.)
  • Hiking stick
  • Insect Repellent
  • Small plastic bag to keep electronics dry in rain
  • Extra clothes (both shirt & pants), can leave in car
  • Plastic bags for dirty shoes/clothes, can leave in car
  • Slippers/Sandals to change into afterwards if shoes are muddy
  • Emergency gear: flashlight, whistle, knife, lighter, 1st aid kit, etc.
  • Optional: gloves, tarp/flysheet, cord/string, mat, water filter/tablets, etc.


Gunung Bunga Buah

My climb up the 1430m Gunung Bunga Buah. A nice day trip, not too difficult for seasoned hikers, but the trail is more like an obstacle course.

DISCLAIMER: This post was written in 2012. Information may be out of date!

Location: Gohtong Jaya (Genting Highlands), Pahang, Malaysia.
Start point: 3.395699N, 101.767510E 922m a.s.l.
Summit: 3.374284N, 101.740044E 1441m a.s.l.
Difficulty: Moderately Hard. Some steep sections, trail is mostly muddy with a lot of obstacles. Not recommended as a first hike, but doable for anyone who exercises regularly.

Date climbed: Sat 1 Sep 2012

Having not climbed any challenging mountains for 2 weeks (not counting my 4th trip to Broga which I found to be easy & relaxed), I was itching to climb something new. I decided on Gunung Bunga Buah as it is fairly close to PJ/KL, and doesn’t have a reputation of being too difficult. I was a bit apprehensive as I was bringing along 3 other people (a total of 4 climbers) to a new location, and I had not climbed with any of them before. Further more, most of them had not done half/full day climbs before.

I would like to quickly touch on the subject of group dynamics, which should be an important aspect to consider – if you climb with people you’ve climbed with before, you know each other’s level of fitness & pacing, and how to motivate one another. I have to admit that I (as the navigator and person who researched the mountain) probably didn’t lead the group as well as I could have, and was too eager to plod on ahead at times. However, I’m glad that we all reached the summit safely and got back out before sunset.

Gunung Bunga Buah stands high at 1430m, but is different from other mountains like Nuang in that you start at relatively high altitude. The trail consists of many ups and downs rather than a single ascent to the summit and back. The great thing about this is that the whole climb is done in nice cool weather. On the other hand, do keep in mind that the return time from the summit will likely take the same amount of time. (On single ascent/descent mountains, the descent is almost always significantly faster) From the research I’ve done, Gunung Bunga Buah is also well known for its leeches. While I’m sure they do come out in large numbers after a rain, we only saw a few around on this particular day, and none of us got any bites. Needless to say, go mentally prepared for these bloodsuckers!

We left PJ around 7.20am, reaching Gohtong Jaya at 8.30am. It’s up to you how close you want to park to the starting point, which is a small orchard/farm. I decided to park in front of a restaurant at the shoplots, just for extra peace of mind as there is a lot more activity going on there. (Hopefully less chance of anything happening to the car, although these days anything can happen)

You’ll have to find your way through the orchard to the start of the trail. It’s a bit hard to describe, so either (1) use the GPS trail I recorded, (2) ask the people at the orchard, who were very friendly, or (3) if you have neither GPS nor people to ask, you’ll have to make a turn around one of the buildings and head towards the slope. Whatever you do, please watch your step and do not step on any of the plants at the orchard, as the land is private properly and we are outsiders ‘trespassing’ on their land to get to the trail. As goes without saying, do not litter – that goes for the whole journey!

The first part of the climb consists of a ~20 minute climb through steep and potentially slippery slopes. If you’re not used to these type of slopes, don’t despair, since it’s only for a short section. You’ll soon find yourself on an old tar road (which used to be the old road to Genting). Keep a mental image of this junction, as you’ll have to go back down the same way when coming back.

Emerging onto the old tar road after climbing through the orchard

From here, keep walking along the road until you notice it bending sharply to the right. At this point, turn left into the undergrowth, and in a minute you’ll emerge at the well known old quarry, with it’s grand looking cliff. Honestly, the photos don’t do it justice – it’s a sight you have to see for yourself.

Junction towards old quarry. Go left here.
The old quarry you’ll emerge at a minute later

Keep walking along the road, which has been closed for such a long time that nature has already reclaimed most of it. Most of the time, you’ll be walking through dense undergrowth, and you’ll be “in touch” (literally!) with nature. As such, long pants are recommended (though not required), if not you may end up getting quite a few scratches and possibly rashes along the way.

At some point, you’ll find  yourself on the other side of the mountain ridge, and you’ll get your first view of Bunga Buah’s peak. It may look far away, but it’s doable! The viewing point also includes a great view of the valley. On our climb, we could hear the loud cries of what we assume to be gibbons – though we never saw any of them.

First view of Bunga Buah’s peak

Keep walking along the dense path (It’s hard to imagine cars drove here many years ago) until you reach the “real” trailhead which leads to Gunung Bunga Buah.

Trailhead to Bunga Buah

From here, there’s a short steep climb, followed by a long downhill section. It can be tiring going down, because you know that you’ll have to go up on the journey back! Interestingly, I tend to prefer going uphill as it’s always easier to find footing and easier on the joints. Those who have climbed Gunung Nuang will recognize the similar clay. Eventually, you’ll reach the bottom of this section, and begin the climb up towards the summit of Bunga Buah. While there are no extremely steep sections, what makes the trail difficult is the sheer number of objects lying across the path – branches, roots, rocks, etc., which you’ll have to either clamber over or crawl underneath. Some people say that Bunga Buah is tougher than Nuang – which may be due to the trail difficulty. (However, Nuang requires vastly more endurance and strength. Overall, I’d say that Nuang is still MUCH more difficult).

Along the way, you’ll come across a clearing with the word “AIR”. I assume that if you turn off at this junction, it would lead to a water source. We did not follow it this round.

“AIR” – highlighted in the photo. Probably leads to a water source.

About half and hour on, you’ll reach the start of the “Rock Garden”, which some say shares similarities to Bukit Tabur. It’s no where nearly as dangerous as Bukit Tabur, but provides a nice change in terrain. At this point, you’ll also be able to get the best view of Genting Highlands (if there are no clouds). We stopped here to eat our lunch. The ground around the rock garden is also oddly spongy. I’d strongly recommend you take careful steps – I don’t know how much weight the ground can take, or if it’s secure. The last thing you want to do is go tumbling down!

View of Genting Highlands (behind the clouds) from Rock Garden

The summit of Gunung Bunga Buah lies about 30-40minutes from the rock garden. There’s a large clearing you’ll reach, but this is not the true summit. Just walk about half a minute further on until you see the triangular metal structure, and here you can end your journey! (I understand that the trail continues further on, down towards Batang Kali/Jalan Sungai Tua, which is a LONG way away)

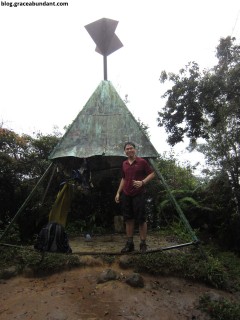
Gunung Bunga Buah’s summit

As of September 2012, the summit is infested with bees, so if you don’t like bees, you probably won’t want to stay at the summit too long! On my climb, we set the turnaround time at 1.30pm, which gave us ample time to get back to Gohtong Jaya. Always set a turnaround time and stick to it strictly!

All in all, Gunung Bunga Buah was an enjoyable, relaxed climb. I’m not sure I’d care to return to it anytime soon, but it’s not bad. We ran into about 20 people in total along our climb, including a big group who had camped up at the summit the previous night. I expect that not many people (if any) climb Gunung Bunga Buah on weekdays. As with any climb, let someone know your plans. There is hardly any phone reception (Maxis, at least) throughout the climb (except near the start and towards the summit).

I have to congratulate 2 within my group – PY and ZR, who completed the climb with broken shoes. ALWAYS be sure to wear proper footwear when climbing places such as these!

GPS Details (From start to summit)


Click for GPS trail map image

Duration: 4 hours 24 minutes (can be done much faster)
Length: 7km
Average Speed: 1.6km/h
Max elevation: 1441m
Min elevation: 922m
Vertical Up: 827m
Vertical Down: 310m

Download GPX, KMZ (Google Earth)
View on EveryTrail

Preparations

Average time: 4hrs up, 3.5hrs down. Plan accordingly. We started ~9am and set turnaround time at 1.30pm

  • It’s not a race. Stick together, and if any can’t make it, turn back together.
  • Depending on weather, may be cold.
  • Bunga Buah is very famous for leeches. Dress appropriately or bring insect repellent if you want to avoid bites.
  • Lots of shrubs/bushes, long pants recommended.
  • Trail can be slippery.

Checklist:

  • Minimum 2 liters drink, isotonic recommended
  • High energy snacks/lunch
  • Hiking shoes & extra socks for comfort, if you need
  • Raincoat/poncho
  • Small towel
  • Hiking stick
  • Insect Repellent
  • Extra clothes (both shirt & pants), can leave in car
  • Plastic bags for dirty shoes/clothes, can leave in car
  • Extra slippers to change into afterwards, can leave in car
  • Emergency gear: flashlight, whistle, knife, lighter, 1st aid kit
  • Optional: gloves, tarp/flysheet, cord/string, mat, water filter/tablets, etc.

(See my personal packing list here)

Gunung Nuang (Attempt 1: Failed)

A failed attempt on the highest peak in Selangor due to time constraints.

DISCLAIMER: This post was written in 2012. Information may be out of date!

UPDATE 26 September 2012: I reached the summit on my 2nd attempt! Read the story HERE.

On 17 August 2012, I attempted to climb Gunung Nuang with 4 other friends. Gunung Nuang, the highest mountain in Selangor, is known to be a fairly difficult climb which usually takes a whole day. From the various blog posts I have read on Gunung Nuang, it doesn’t seem to be a particularly fun mountain to climb, being famous for never-ending muddy and slippery slopes, and very few nice views. While the 1493m peak isn’t nearly the highest in Malaysia, the challenge comes from starting at a low altitude of 190m.

The climb can be separated into a few sections: Start – Never Ending Road – Kem Lolo – Kem Pacat – Puncak Pengasih – Summit.

The weather had been rainy for a few days prior to our climb, so we went mentally prepared for leeches and muddy terrain. We left KL around 6am and started our hike just after 7am, as the skies were just starting to turn light. By the time we had hiked for 20 minutes, almost everyone had picked up hitchhikers: leeches. They would become a constant sight throughout the trip, both on the trail and on our legs. By the end, everyone had 5-10 bites, except myself, as I had decent leech protection on.

We reached the end of the “never-ending road” at 8.30am (1:15hrs hike) . Unfortunately, we took a wrong turn and ended up crossing the river twice, unnecessarily. The detour cost us almost half an hour, after which we arrived at Kem Lolo @ ~9.15am (~2:00hrs hike). After that, it was a long slippery road to Kem Pacat, which we reached at 11.10am (4:00hrs hike). Unfortunately, due to time constraints (one in our team had to be down by 6pm) and my pace being on the slow side, we realized that we would not make the peak in time to get back by 6pm, so me and a friend stopped at Kem Pacat. The other 3 left any unnecessary items behind and set off for the peak.

The 3 other climbers returned to Kem Pacat at 1.40pm, unfortunately not having made it to the top. There had been a fallen tree along the path which took a long time to clear. They reached Puncak Pengasih (~1480m) at ~12.30pm, and decided that they wouldn’t make it in time to the peak for the 6pm return time. Also, water supplies were running slightly low.

We all headed down, reaching the entrance just after 5pm. We were defeated by Nuang, mostly because of time constraints. I will be climbing it again, as I know I am capable of reaching the top. For now, Nuang can laugh at us, but we WILL defeat it!

Here’s the 5 of us who climbed that day. (I didn’t really take any photos, and didn’t mark any waypoints on my GPS, as I was tired and didn’t have enough time to do so anyway. Next time!)

GPS Details

Download GPX
View on Everytrail
View on WikiLoc

Total distance: 10km (to Puncak Pengasih)
Total time: 5 hours 15 minutes (to Puncak Pengasih)
Average speed: 1.7 km/h
Max elevation: 1481m
Min elevation: 190m
Vertical Up: 1609m

From Everytrail:

Story
Didn’t make it up to the summit. A few factors:

  • Heavy thunderstorms for previous days meant trail was very muddy and slippery
  • High humidity meant more sweating
  • Time constraints (had to make trip < 10hrs)
  • Not enough water
  • Not enough sleep previous night
  • Accidental detour near Kem Lolo

There were a ton of leeches.

Tips

  • Climb on a dry day
  • If you have a water filter, you can refill at Kem Lolo (5.8km from trailhead ~600m)
  • You can leave unneeded supplies at Kem Pacat (1100m) to make your summit attempt easier. Either mark your belongings or leave a few friends there. Collect your supplies on the way down.
  • DON’T leave trash around!!!
  • At the first river, don’t go down the steps to cross the river. Take the trail on the left to follow the big pipe.
  • Bring headlamps, you may end up climbing in the dark

Malaysian Mountain Hiking Gear

A while back, I wrote a post on what I EDC (Everyday Carry). While that list included many items which I do find useful, a number of them are only useful in an urban area. Further more, when one is climbing mountains, any extra weight makes things a lot harder. Here is a list of the probably-still-more-than-necessary equipment I use while hiking. To be honest, I’m far from being an experienced hiker, but as someone who loves gear, I thought I’d still write this.

Clothing & Shoes

Top: Cheap & thin t-shirt (mostly the breathable sports type). Something I don’t care about if it gets dirty or torn. If I’m climbing high altitudes, I may wear a singlet underneath.
Bottom: I wear a pair of cycling shorts (tight), which prevents chaffing and leeches, and can also be used as swimming attire. On top of that, short sports pants mostly, but for high altitudes (or very narrow trails) I wear trek bottoms.
Socks: 2 pairs of socks for greater comfort, and if I’m going somewhere leech infested, I add 2 pairs of thin stockings in between the socks to prevent leeches from getting to my feet.
Shoes: A pair of Columbia hiking shoes. Lightweight and decent ankle support, though unfortunately not waterproof. It does have a few flaws: the treads are too close together to be effective in the mud, and wear out over time. In addition, there isn’t enough protection near the bottom of the sides against roots/rocks. I also have a pair of kampung adidas, which I have not gotten around to using yet.

Clothing. Clockwise from top left: T-shirt, cycling shorts, short pants, 2 pairs of socks, 2 pairs of stockings, extra socks, singlet, long sleeve singlet, raincoat
Columbia Hiking Shoes

In addition, I carry the following in my backpack:

  • Extra long-sleeve single for warmth
  • Extra singlet
  • Extra underpants
  • Light (<1500m) or medium (>1500m) raincoat – Also for extra warmth if needed
  • Extra pair of socks

While most mountains in Malaysia don’t get very cold, if it rains heavily, summits can be EXTREMELY windy and cold, to the point where you start shivering badly. I’d estimate with wind chill, you may experience chills < 10 degree celcius. There are times I’d consider taking my lightweight down jacket or a fleece T-shirt, but generally a singlet + long sleeve singlet + t-shirt + raincoat is sufficient.

Navigation & Electronic Gadgets

  • Small compass – Only good for finding North/South/etc. Will replace this with a Suunto A-10 in the future
  • Qstarz BT-Q818XT Bluetooth GPS receiver – I found my phone’s GPS to be inferior. With AGPS, I get <10 second locks and <2m accuracy (with DGPS in the USA I get ~1m accuracy). 36hr battery life and makes my phone last longer
  • Samsung Galaxy S Plus GT-i9001 – Nav Software: Google Maps  & Navigation, GPS Essentials, Bluetooth GPS, My Tracks, EveryTrail, Compass, SkEye. The main reason I went with Android was the fact that I could easily use external GPS receivers and remove the battery (I carry an extra).
  • Casio Pathfinder PAS400B-5V watch – Technically a fishing watch; it’s rugged (nylon strap), shows moon phase, sunrise/sunset and has a silent (vibration) alarm
  • Topographic map of the area – Sometimes I get lazy to print it out, but honestly it’s good to do so, in case the GPS breaks. Although it’s next to impossible navigating in the jungle anyways, if you’re lost, unless you’re very experienced.
  • Digital Camera – currently I’m using a Canon Ixus 310HS which isn’t mine, but generally I let others take photos

IMPORTANT:My GPS, smartphone and camera go into waterproof pouches to protect them from rain & rivers/streams. One definitely can’t afford to have them die in the middle of a hike!

Part of my collection of waterproof bags & drypack

Flashlights, Fire, Signalling & Emergency

Light:


AA battery included for size reference

  • 4Sevens Quark AA (0.2 – 170 lumens) – Main flashlight. Small and powerful, I run it on a Li-Ion. Soon to be replaced with a dedicated headlamp, probably the Zebralight H51F[w].
  • 4Sevens Quark 123^2 (0.2 – 190 lumens) with headband – Secondary flashlight which I can also turn into a headlamp. I run it on a rechargeable Li-Ion cell with 2 spare CR123 cells in my backpack.
  • iTP EOS A3 (max 80 lumens) – Backup flashlight, runs 1xAAA. I hardly ever use this (it’s really small & light) but it’s there if I need it.
  • 4Sevens Quark Turbo X 123^2 (max 500 lumens) – I only carry this if I’m going somewhere I know I’ll need a lot of light.

Fire:

  • 2″ Firesteel / Ferro rod
  • 2x WetFire fire starting tinder
  • 2x simple butane lighters
  • Small box of matches
  • Candle

AA battery included for size reference

Signalling & Emergency:

  • Whistle (Fox 40) – It’s loud and works underwater, but it does require a reasonably strong blow, so effectiveness in an emergency is yet to be tested
  • Signalling Mirror – Good as a general purpose mirror but also features a sighting hole which shows exactly where you’re pointing light
  • Emergency Blanket

Tools & Knives


AA battery included for size reference

  • Benchmade 556 Mini-Griptilian – A small but sturdy 3″ knife. Personally, I find it on the heavy side, but it serves me well. I keep it in a drybag (or wetbag) as tropical jungle humidity can ruin even 154CM steel. Alternatively, a 2.5″ SOG Flash 1.
  • Spyderco Ladybug H1 – Backup blade, very small but rustproof
  • Leatherman Juice Multitool – Decent for its size, although I don’t really like the can opener and scissors compared to those in Swiss Army Knives. Recently, I stopped carrying this as I didn’t find the need for pliers that often.
  • Swiss Army Knive (Tinker)

These days, I generally also pack a small 10″ machete/parang, Chandong style. While it’s really not big enough to do proper cutting, it’s still ok in emergencies, or clearing the odd bush or branch. I decided that if I got a bigger parang, I’d never carry it because of its weight!

Depending on the length of the trip, I may bring my set of sharpening stones – 4″ DMT diamond stones (photo below). At home, I use the Spyderco SharpMaker, and so keep all my knives with 15°/20° edges.


AA battery included for size reference

If you’re going on an uncleared path or need to do any serious work, a machete is essential. Unfortunately, I don’t have one right now.

Food & Hydration

Food tends to vary a lot, but I try to carry carbohydrate-rich snacks, and fatty food. This tends to be foods like nuts (cashew is my favorite), peanut butter/nutella sandwiches, oat bars, dried fruit, etc.

Now and then, I carry a small alcohol stove I made (a penny stove), with about 60ml of methylated spirits and a small mess tin, however, I’ve generally found this unnecessary as I bring foods which do not need cooking and already carry a good amount of water treatment devices.


AA battery included for size reference

For hydration, I sometimes carry the 2x 1 liter bottles pictured above, but these days tend to just use the standard lightweight plastic bottles (600ml and 1.5L), to carry anywhere between 1.2-6L of water. I tend to sweat a lot, so all liquid I carry is isotonic (I make my own isotonic drink with 50ml ribena + 1/4tsp salt per liter of water). On long climbs, one may have to refill water, so I carry a few measured packets of salt, each to be diluted in 1 liter of water, and 30 grams of sugar, as well as 75g of glucose drink mix. If I don’t consume enough salt, I start getting muscle cramps.

For water treatment, I carry:

  • Small carbon water filter, good for 75L of water, pictured above
  • 10 chlorine dioxide tablets, each good for 1L
  • LifeStraw 0.2 micron filter, good for 1000L, pictured below.

One thing I lack currently is a proper hydration pack, which would make life much easier!

Shelter

I carry a 7’x10′ lightweight tarp/flysheet, to which I’ve attached 4m of mini paracord (2mm) to each of the 6 attachment rings. In addition, I carry a hammock with an attached mosquito net. With this lightweight setup, I can pretty much camp anywhere if needed. (I.e. in case I can’t cross a river due to high levels, etc.) Of course, it does add about 1.2kg to my overall pack weight.

Rope/cordage

I’m a huge fan of ropes and knots, and even though I don’t do any climbing, I always have cord with me. On person, I always carry 10m/30ft of orange paracord.

In my bag, I have:

  • 30m/100ft of green paracord (pictured above)
  • 7m/23ft of 15kN 25mm tubular webbing
  • Some amount of 25mm/400kg rated webbing for my hammock
  • 30m of rafia string (mostly for marking trails)
  • 7m of mini paracord
  • 2x 30kN lightweight non-locking D-carabiners

I’d love to carry a good amount of proper 6-8mm static rope for me (i.e. Amsteel Blue), but costs just don’t allow me to do so right now.

Other

I generally carry a wooden hiking stick, which has many uses besides being a hiking stick.

I use a medium sized 32L Columbia backpack which isn’t suitable for camping (for which I borrow my friend’s 70L pack), but works well for day hikes, and has good waist support. Inside it:

  • 1st aid kit (medicine, bandages, tweezers, etc.)
  • Small tub of Vaseline (for preventing chaffing)
  • Small notebook, mini sharpie, mini pen
  • Sewing kit
  • Fishing kit (courtesy Lee YK)
  • Glue (Superglue & small hot glue stick)
  • Garbage bag & zip-lock bags
  • 25 liter Deuter dry/wet bag
  • Tissue paper & small towel
  • Bandanna
  • Roll of gaffer tape
  • Extra eyeglasses & swimming goggles – For full UV/impact/wind protection and swimming.
  • Clip-on sunglasses
  • Insect repellent (I have 2 types – Mosiguard [lemon eucalyptus oil] & DEET) – VERY important in the jungle!
  • Garden gloves

There are a few other small items I carry around but they’re not really related to hiking so I didn’t bother mentioning them.

In general, my pack’s weight without any liquids tends to weigh in about 5-7kg. There are times when I imagine I’d be able to complete a hike much easier if not for the extra weight on my back, but honestly, I consider it good training, and it’s comforting to know I have most of the essentials on me.